26 April 2021
Laser Trader introduces a new laser scanner characterisation device from PRIMES
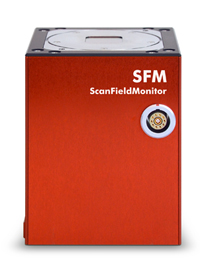
 With the advancement of 3D printing in the manufacturing industry it is imperative that quality assurance is conducted efficiently and accurately. PRIMES continues its long-standing history in providing systems and devices designed to measure, test, analyse and diagnose beams and scanners, with its new ScanFieldMonitor (SFM).
From the BMW i8 to Elon Musk's SpaceX's Dragon V2, parts made with additive manufacturing (AM) are frequently being used. One problem with AM can be quality - the most common causes of poor component quality in selective laser melting (SLM) are the condition of the powder and poor exposure parameters of the laser.
Almost all measuring tasks are combined in one device
"In less than three seconds, the SFM determines the most important production parameters," says Stephan Holesch, sales engineer at PRIMES. "With special measurement schemes, it is also possible to determine pincushion distortion, the merging of overlapping scan fields, the focus shift, and the laser switch-on and switch-off delay." In the process, thanks to the 3D machine-building platform, motion along the z-axis can be used to measure caustics and field flatness.
The strength of the system lies in the combination of many measuring tasks in one device. The compact measuring unit allows characterisation at random positions in the working area under actual process conditions and control from outside the unit.
The patented measuring method is based on a specific measuring structure consisting of 10 to 15 µm wide lines engraved in a glass plate. When the laser beam passes over this structure, a photodiode measures the light scattered by the lines. These peaks provide the path of the laser beam over the measurement structure. Using the sampling rate of the photodiode, the system determines the travel speed, starting point and end point of the laser beam. From this, the algorithm calculates beam diameter, reconstructs path, position and length of the beam, M2, Rayleigh length and divergence, also for the deflected laser.
In this way, it is also possible to detect path deviations in the outer areas. From the evaluation of all measurements, the user additionally receives derived quantities, such as switch-on and switch-off delay of the laser, as well as the focus position over the entire processing field. In contrast to conventional beam diagnostics, the SFM measures the moving beam at full laser power.
Data acquisition occurs in the time it takes the scanner to write the vectors, i.e. it is in the range of a few milliseconds for the complete sequence. This makes the method also suitable for time-resolved analyses, such as the examination of thermal lenses.
Timing and synchronisation
To position a fusion track in the powder bed, the illumination sequence of the laser must be precisely synchronised with the movement of the scanner mirror. Since the SFM provides absolute position information, it can be used for calibration.
Absorption-induced thermal focus shifts are normal when using high-power lasers. Thanks to measurement frequencies of up to 500 Hz, the transient behavior of thermally induced shifts can also be investigated. At 80 x 80 x 100 mm3, the system is small enough to be placed in several locations across the work area and is based on DIN 35224/ISO/ASTM CD 52903-2.
An Ethernet interface is now added to the existing WLAN module and the measurement of the caustics can happen automatically, which now only takes 0.5 min for 20 levels instead of 15 min. The device also recognises whether it is moving in the x or y direction, and the setting of the photodiodes happens automatically.
- Contact Information
- Name: Bradley McBain
- Email: bradley@lasertrader.co.uk
- Website: www.lasertrader.co.uk

